BARF Homebrewing.

Jakemate

Pastafarian Minister
Beer is liquid bread. It is the first form of long term grain storage. Beer is the discovery that created modern society.

Brewing beer is an art for the talentless. There is more labor, science, and ingredient combination than in wine making.

In wine making, there is small effort and a long wait. In brewing, there is a large effort and a short wait.

Remember, if you can bake cookies from scratch, by following a recipe; YOU can brew. Hell, if I can do it, a monkey can.

Basic brewing equipment.

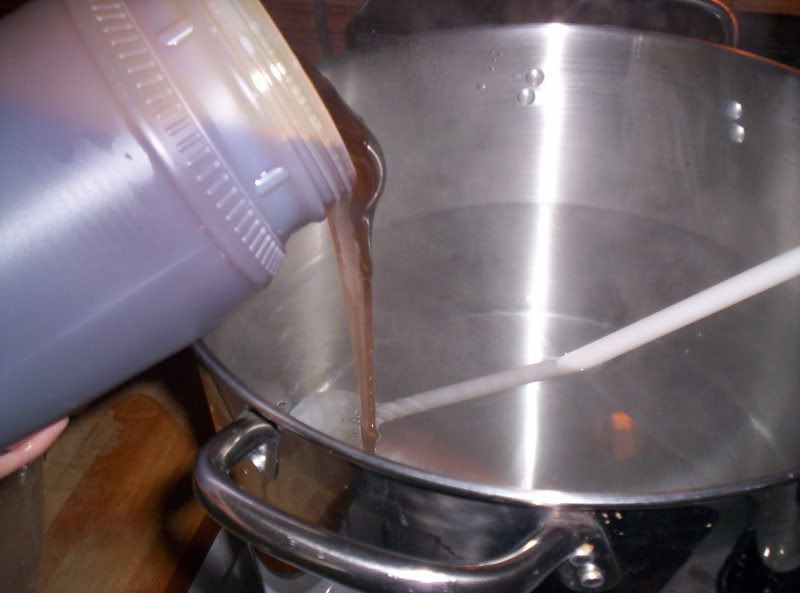
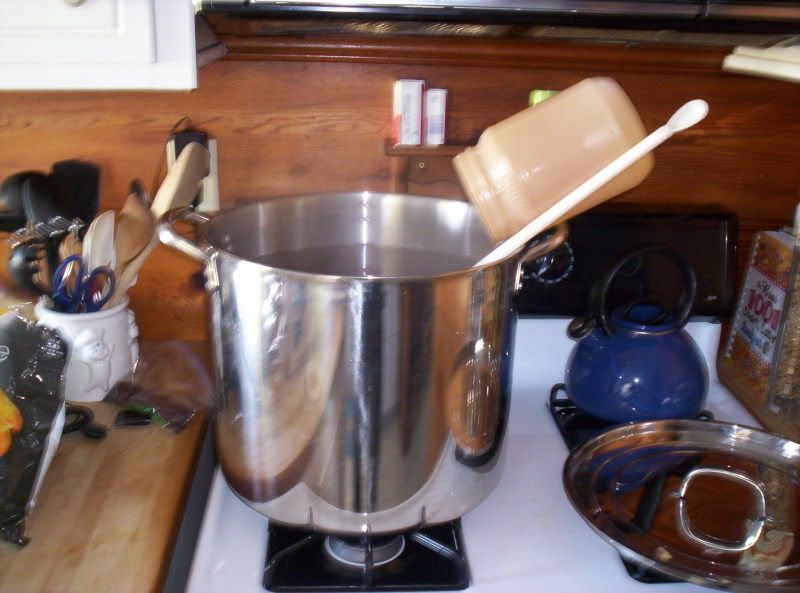
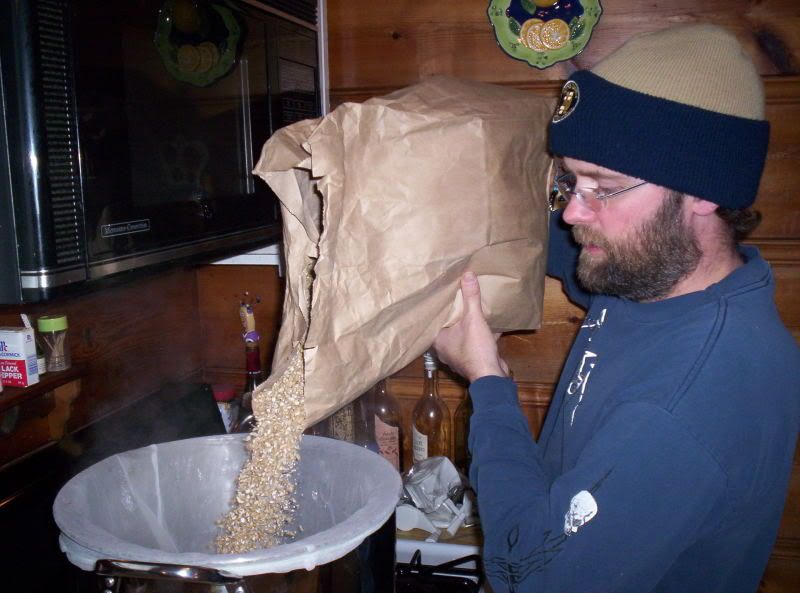
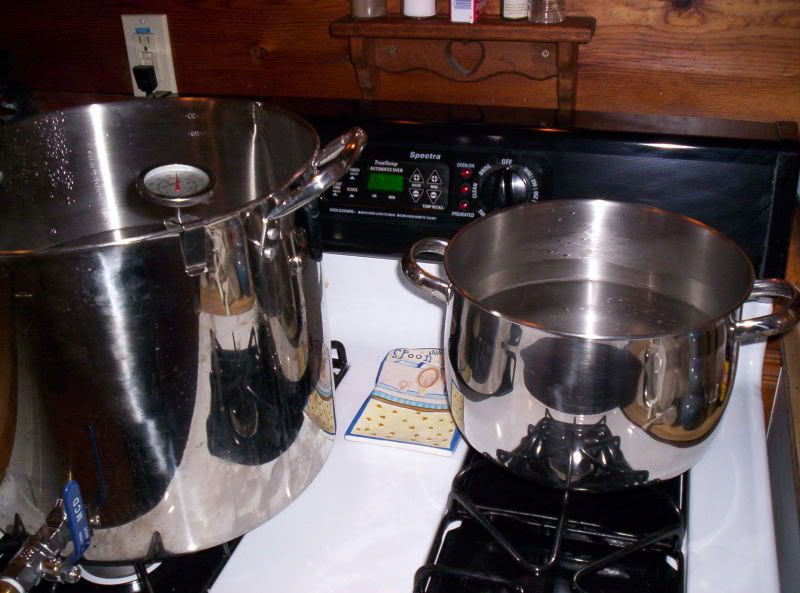
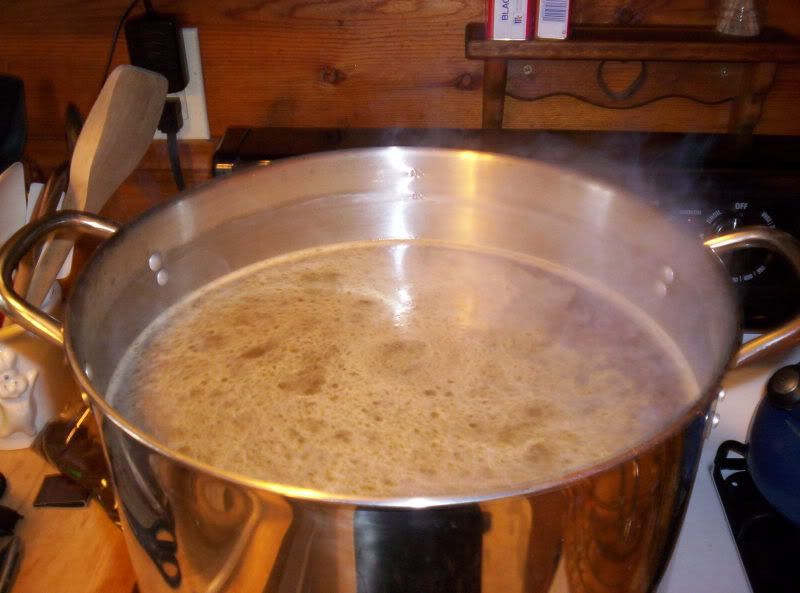
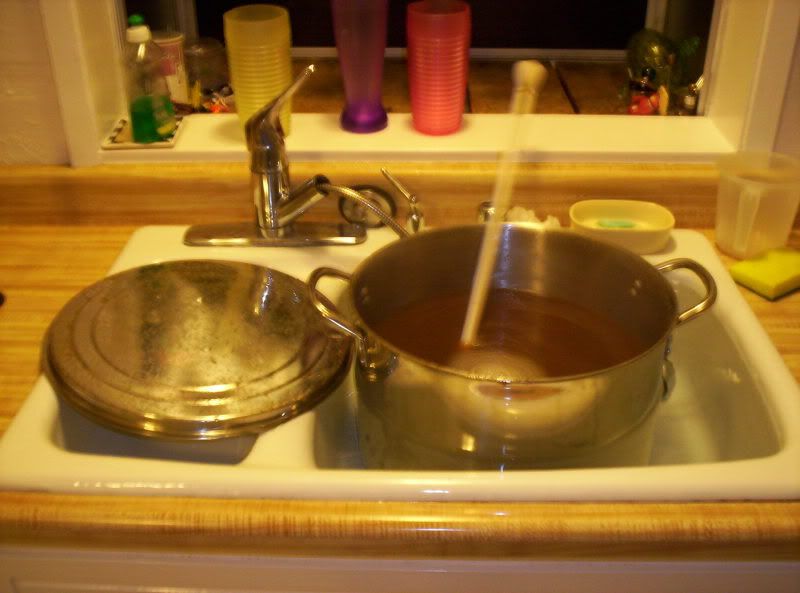
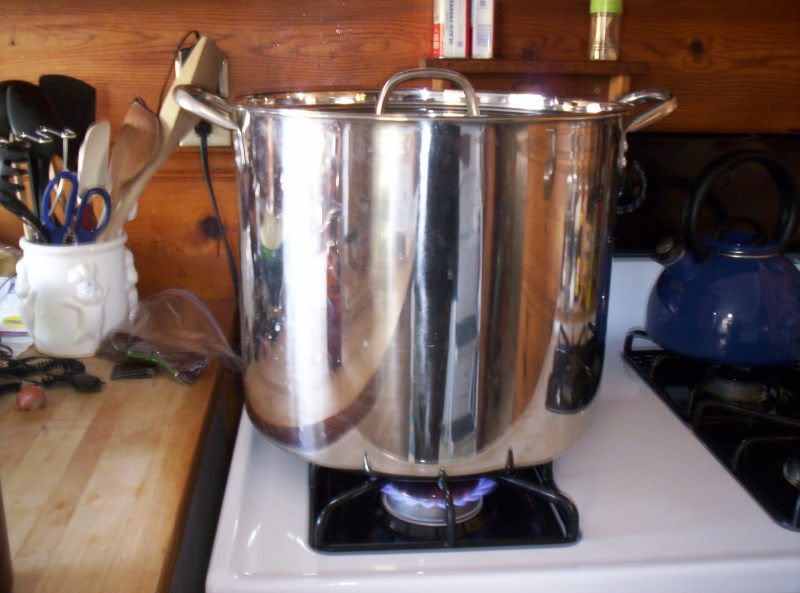
1 To start, the most important thing is your brew kettle. You can get by with an enamelware 5 gallon pot, if you brew short batch.

Short batch is a 3 gallon boil, adding 2 gallons, (or so), of cold water at the end to chill the finished wart.

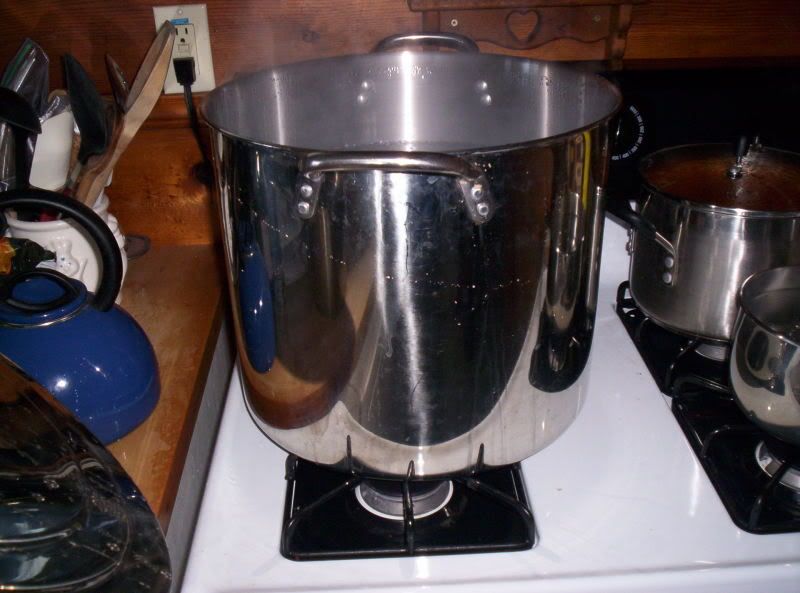
I use a 30 liter stainless steel kettle. I prefer the larger kettle to avoid a messy boil-over. Do not use an aluminum pot. Aluminum has no place in any of your brewing equipment.

Picture001-1.jpg


2 Next is fermenters. You can use brew buckets, nothing wrong there. You can pick them up from homebrew suppliers. Alternatively, you can purchase 7 gallon food grade buckets and lids from a resturant supplier. Buy then new and clean.

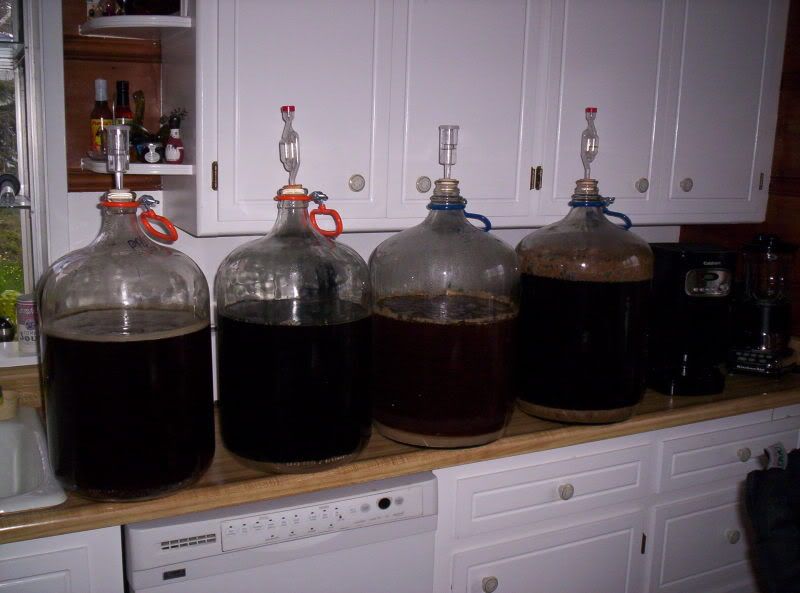
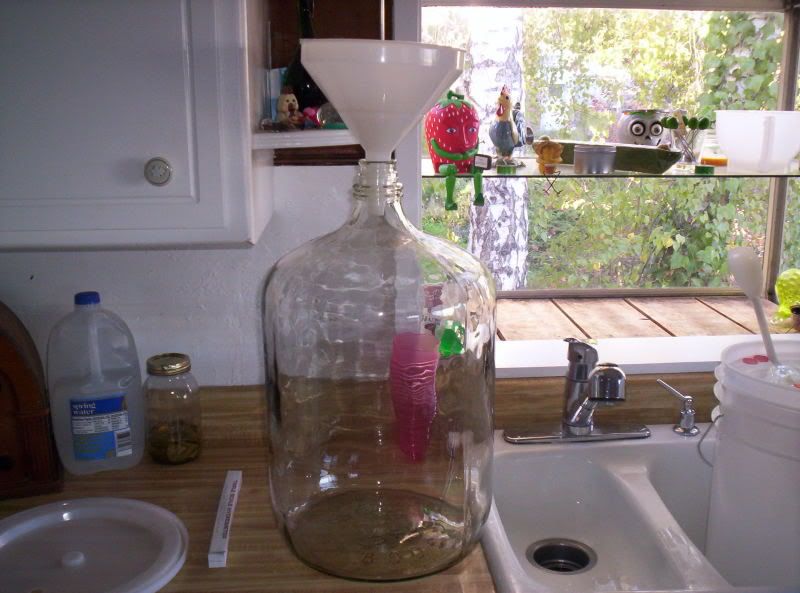
I prefer glass carboys. I use a 7.5 as a primary fermenter and a 6.5 for the secondary. If you use carboys, purchase a carboy brush for cleaning.

3 Airlocks and corks. You need a rubber cork to fit the hole in the lid of your bucket, or the mouth of the carboy. The cork has a hole for your airlock. There are various airlocks, ranging from a PVC tube running into a bottle of sanitizing solution, to some with moving parts, double/triple/quadruple trap, etc. It's like underwear, everybody likes what they have.

I recommend getting an extra cork and airlock, whatever way you go.

4 Racking cane, tubing, and bottle filler. You can get a plastic cane or a stainless steel one. I prefer the stainless. If you are piecing together your equipment, go for the stainless. The tube is PVC, might as well purchase it with the cane. The supply store will have it in stock as well as the bottle filler. The bottle filler is a plastic tube that the tubing fits on. It has a push valve at the bottom.

5 Bottle capper. There are a bunch available. The supply store will help you choose the one that fits your needs.

6 Hydrometer and sample jar. These are pretty basic and inexpensive.

7 Thermometer. Again, the supply store can guide you here. I use a few different types.

8 Brew spoon. You can find a nice big stainless steel one, or get a plastic vintners/brewing spoon. This is a matter of personal preference.

9 Empty, clean bottles. Drink your favorite brews. Rinse the bottles when you are done, that way they are easier to sanitize when you bottle.

10 Cleaning and sanitizing. I use sodium percorbonate for cleaning and BTF sanitizing solution for sanitizing. I have seperate no-soap sponges for cleaning. Soap and bleach have no part in brewing.

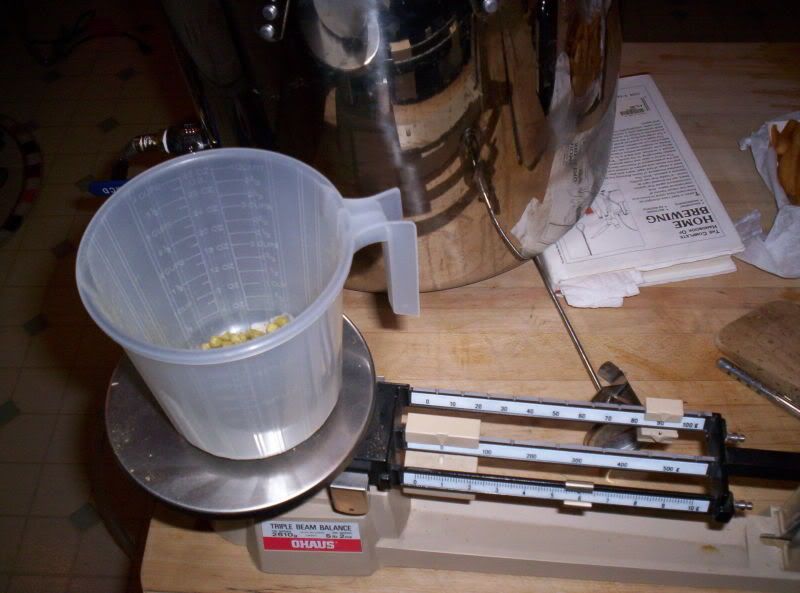
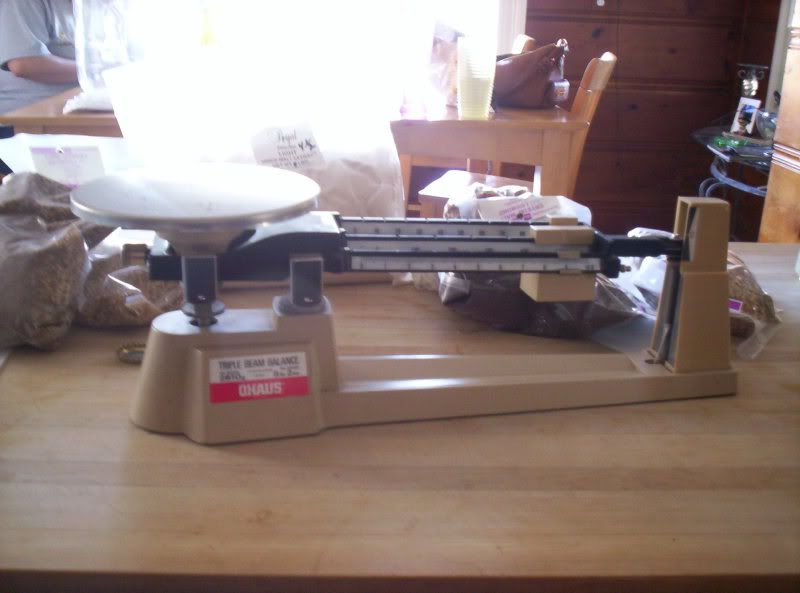
11 Kitchen scale. This is for weighing your hops. I use a triple beam I got from a garage sale.

Picture002.jpg


You can start with a kit from one of the homebrew suppliers. They usually come with buckets and all the basic pieces needed, except for the kettle and scale.

Additionally, I use a large funnel that fits into my carboy. They sell these at the supply store. They have a special channel that vents the air. It makes pitching the yeast, aerating and transferring the wart quick and easy. If you are piecing together and using carboys, I highly recommend one.

Picture003.jpg


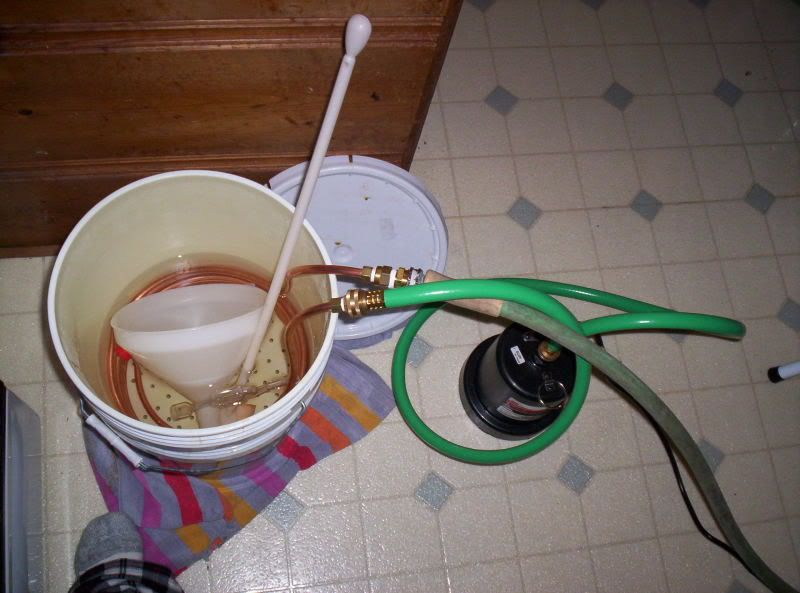
Also, a wort chiller is nice for bringing the wort temperature down rapidly. I use mine with a sump pump. I put the sump pump in a cooler full of ice and some water. This helps save a ton of water.

Extra equipment for all grain

There are many variations of all grain brewing. In Dave Miller's books, he describes the methods.

For a Lauter Tun, you can use a bucket with a spigot and a drilled bucket on top as a strainer. In the top bucket, you use a nylon strainer to keep a clean grain bed.

This method is a little difficult when it comes to heating and resting.

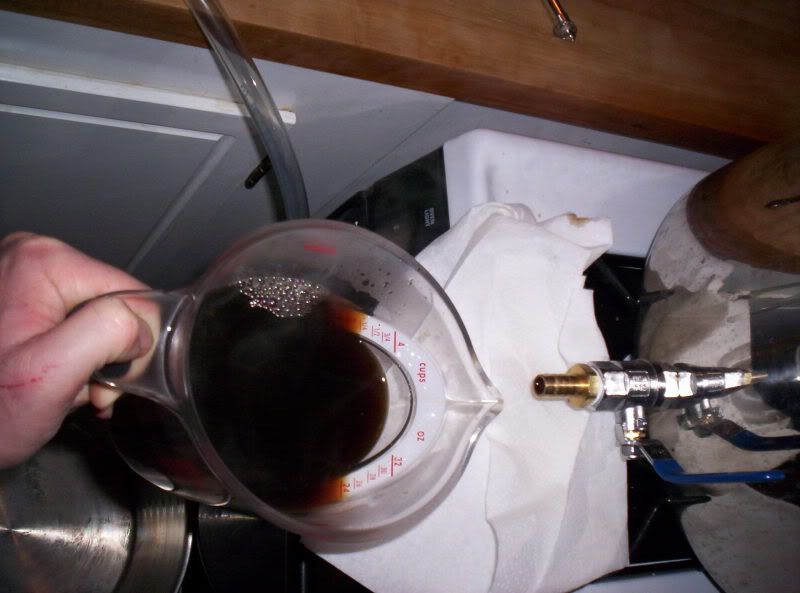
I use a mash kettle. I purchased a banged up 30 liter SS pot, added a false bottom and a spigot. It makes all grain less tedious.

PH strips should be used until you know how your water reacts.

That's all I can think of right now. I'm sure I'll be adding more.
 
Last edited:

Jakemate

Pastafarian Minister
I'm cooking 10 gallons of beer tonight.

5 gallons the easy way, (malt extract), and 5 gallons the hard way, (all grain).

I start by putting 4 gallons, (two gallons per batch, maybe one extra), of distilled water in the fridge and boiling my mash/wart water to help remove chlorine. I run a 140 strike heat for all grain or extract. That's just where I cool my water to. YMMV.

Everything that will contact the wort after the boil must be sanitized. That goes for spoons, fermenters, wort chillers, thermometers, etc. I use an extra bucket with sanitizing solution. I sanitize every thing.

100_1967.jpg


STARTING THE EXTRACT BREW

I like brewing short batch. I'll be boiling ~3 gallons of water, (malt extract), and adding ~2 gallons of chilled distilled water to reach my 5 gallons of beer. This, like much of brewing, is personal preference. I spend most of my time/money trying to conserve water/more money. You'll see how I'm thinking....
Picture010.jpg

When the water gets DOWN to 140, add the steeping grains. Some kits come with a cheese cloth bag. I prefer 1 gallon nylon paint strainers. They are cheap, (hardware store), and work well.
I steep the grains until I start getting towards boiling, (around 165), then remove. I add the syrup/dry extract at this point.

100_1788.jpg

Picture004.jpg


If you're smart, you will skip down to the boil. The all grain step is taken care of with the extracts. To be completely honest, you can make constantly out-fucking-standing beer with syrup/dry extracts. Really, I have no clue why I'm doing the extra work of converting grain to sugar. Maybe it's boredom.
 
Last edited:

Jakemate

Pastafarian Minister
STARTING THE ALL GRAIN MASH

I've got 11.5 pounds of cracked grain. I calculate 1.5 quarts of water, per pound of grain OVER the false bottom of my mash kettle. So, I take up that dead space with extra water. I keep some warm distilled water for sparging and if the grains soak more than anticipated. I still have 2 gallons of distilled water in the fridge for the wort chilling.

I use a 5 gallon + paint strainer in my mash kettle. It makes the beer more clear, and clean up is a breeze.

Picture049-1.jpg


Add grains gradually.

Picture050-1.jpg


I warm up my oven while I start the mash. I use it for the protein rest and mash out rest. This is also the time to make sure your sparge water is heating up.

100_1943.jpg


You will want to add some heat, as the grains will soak some up. If you don't, it takes forever to get to the starch conversion range. I keep some warm distilled water in case the grain drinks more than anticipated.

Sometimes you have to add a lot of heat. I lauter at this point, while I stir the mash. Adding the heat in short bursts.

This is the time to check your PH and add any adjusters you find necessary. I don't bother. My water has always had the correct PH, so I don't bother with that anymore.

Picture051-1.jpg


When you are in your desired temperature for the mash in, put the lid on your kettle, and put it in the warmed oven. I shoot for 140 and leave it. There are many ways to mash, I just try to get it done.

The protein rest is 30-60 minutes. As with a lot of brewing, the amount of time is based on personal preference. Hell, most of the time I'm trying to keep the temperature right, and am done with the protein rest before I even start.

When the rest is done, put the kettle back on the stove for the mash out.

Bring the temperature up to 168 degrees, lautering and stirring, and hold it there for 5 minutes.

Different recipes may call for different temperatures and resting periods.

Lauter your grain bed for a few minutes.

100_1955.jpg


100_1956.jpg


Then start draining your mash kettle. When the draining of the bed slows, I sparge the bed with my hot sparge water.

With the sugars rinsed from the grain bed, I can now start boiling this mess.
 
Last edited:

Jakemate

Pastafarian Minister
THE BOIL

If you made it this far, you have a pot of wort that needs to boil for an hour.

Picture007.jpg


The boil is where your particular recipe is going to guide you for the hop additions.

100_1963.jpg


I like to weigh my hops. You can eyeball them, if you wish.

Generally, at the start of the boil you add your bittering hops. Then, depending on the recipe, hops are added at different intervals.

After 30 minutes, add your irish moss, (1 tsp or one whirlfloc tablet).

At the end of the boil, aromatic hops are added.

Now comes the fun, you have to cool the wort from boiling down to 80-90 degrees. The simplest way is with the kettle in an ice bath.

Picture008.jpg


With the short batch, pour your cold distilled water in at this point. Pour in enough to bring the wort up to 5 gallons. The tops of the bottles should be sanitized before opening and pouring. The same goes for the yeast package.

When you get down to pitching temperature, pitch the yeast and transfer to your sanitized primary fermenter.

100_1981.jpg
 
Last edited:

Jakemate

Pastafarian Minister
I think that's about it until secondary fermentation.

I'll pick up there when I rack over and capture some images.

I look forward to hearing how other homebrewers here are cooking their swill!

Until then, cheers!

100_1215.jpg


My usual suppliers:

I like these guys. I prefer them if I have time to drive. Samples for while you shop, all grain classes, great prices, and great help. Grain cracker in back for your use. http://www.oakbarrel.com/

These guy's have everything. They are also 2 blocks from my shop. A little pricey, I think they charge extra for cracking grain. http://www.brewmasterinc.com/
 
Last edited:

wilit

Well-known member
Mmmm... Can't wait to taste the new batches. I love the red in the kegerator right now. YUM!
 

spddrcr

NEED DECALS? PM ME!!!!
ok guys and gals, Ive decided to brew more beer after my 2 year hiatus from brewing and at the request of my wife and friends so im thinking what better way to to get back into it then by having a big brewday/techday at my house on the first day of the new year:teeth

anyone interested in coming out to concord to brew? I have multiple equipment setups for doing extract and 1 setup for partial brewing. I also have just about every known tool for fixing bikes.

does this sound like a good idea or am i crazy?:wtf
 

uhmeebuh

Ginger Ape
Best. Thread. Ever. I've been meaning try brewing my own...

Timmeh - post up your best recipes...unless it's a secret brew ;)
 

Ironbutt

Loves the anecdotal
I use pretty much the same setup as you but I don't use a wort chiller.. We dump ice into it to make up for the boiled off water.

I call it "Zero Science Bairdweiser"

We had really good success with the triple's and hef's .. although the triple was really chunky and I think the next step up would be a filter of some type and acquiring spddrcr's kegerator with some way to pressurize the beer so we didn't have to wait a month for it to bubble up.

We should just make some super brew at spddrcr's house.. I'm up for it..
 

Jakemate

Pastafarian Minister
Lookin good, have you been to more beer in concord?

gp125racer


No, but I might stop by if this happens......


ok guys and gals, Ive decided to brew more beer after my 2 year hiatus from brewing and at the request of my wife and friends so im thinking what better way to to get back into it then by having a big brewday/techday at my house on the first day of the new year:teeth

anyone interested in coming out to concord to brew? I have multiple equipment setups for doing extract and 1 setup for partial brewing. I also have just about every known tool for fixing bikes.

does this sound like a good idea or am i crazy?:wtf


I think I could stay sober enough to do this!


I use pretty much the same setup as you but I don't use a wort chiller.. We dump ice into it to make up for the boiled off water.

I call it "Zero Science Bairdweiser"

We had really good success with the triple's and hef's .. although the triple was really chunky and I think the next step up would be a filter of some type and acquiring spddrcr's kegerator with some way to pressurize the beer so we didn't have to wait a month for it to bubble up.

We should just make some super brew at spddrcr's house.. I'm up for it..


The only problem I would have with dumping ice is the content of chemicals, like chlorine, that could be in the ice. I use to boil a bunch of water ahead of time and refrigerate it. Now, I'm lazy and buy distilled water to chill. :laughing Well, that and the chiller.

With kegs, you can drink right after fermentation. When you prime and cask, (or prime and bottle), you are letting the yeasties have a second, light meal. In a sealed container, the CO2 has no where to go but into the liquid. That's how it carbonates.

If you don't prime your brew at kegging, you force carbonate. There are a lot of ways to do it. I drop 40 or so psi on the tank and refrigerate. I check it every day and refill for a few days. At the 4 day mark, (or later), I purge, hook up, and drink.

I've had to force carbonate a number of kegs lately. Apparently I have leaky poppets. :p My kegs have been leaking gas. I've had no problem getting them bubbly. Although, some headspace in the kegs seems to allow the beer to carbonate more quickly.

As far as filtration.......

Say you are going to cask condition. You prime your keg and age it. You may even have a tea bag of hops in the cask. After the few weeks or so of conditioning, you can filter.

Clean a keg, purge all the air with co2. Hook your beer to co2 as normal. On the out, you put a wine filter and valve. Hook the filters other end to the out on the clean keg. You can control the flow with the lid vent on the clean keg.
 
Last edited:

Ironbutt

Loves the anecdotal
Oh great beermeister...

Yeah.. we've had short arguments about the contaminants in the ice and I swear I can taste it but the beers still pretty damned good.

Although... the past success are shadowed by our iodine cleaner contamination of the last batch.. yuck! I can still taste it.. That's where we left off..

We were buzzed; Tory was siphoning the beer into the bottles for bubbling.. and instead of filling the bottles she just kept the hose in her mouth and kept drinking.. Then she looks up at me and says.. "I got a buzz" this beer is great! so I get to siphoning too.. then we forgot to rinse the 1 gallon jugs out really well.. ugggghhh... The bottles were okay.. the jugs we dumped down the drain..


I'd like to make a pilsner this next time.. Do you have suggestions? I usually buy the kits from 'more beer'...


No, but I might stop by if this happens......


I think I could stay sober enough to do this!


The only problem I would have with dumping ice is the content of chemicals, like chlorine, that could be in the ice. I use to boil a bunch of water ahead of time and refrigerate it. Now, I'm lazy and buy distilled water to chill. :laughing Well, that and the chiller.

With kegs, you can drink right after fermentation. When you prime and cask, (or prime and bottle), you are letting the yeasties have a second, light meal. In a sealed container, the CO2 has no where to go but into the liquid. That's how it carbonates.

If you don't prime your brew at kegging, you force carbonate. There are a lot of ways to do it. I drop 40 or so psi on the tank and refrigerate. I check it every day and refill for a few days. At the 4 day mark, (or later), I purge, hook up, and drink.

I've had to force carbonate a number of kegs lately. Apparently I have leaky poppets. :p My kegs have been leaking gas. I've had no problem getting them bubbly. Although, some headspace in the kegs seems to allow the beer to carbonate more quickly.

As far as filtration.......

Say you are going to cask condition. You prime your keg and age it. You may even have a tea bag of hops in the cask. After the few weeks or so of conditioning, you can filter.

Clean a keg, purge all the air with co2. Hook your beer to co2 as normal. On the out, you put a wine filter and valve. Hook the filters other end to the out on the clean keg. You can control the flow with the lid vent on the clean keg.
 

Jakemate

Pastafarian Minister
"I got a buzz" this beer is great! so I get to siphoning too.....

:laughing

Ah, the hazards of home-brewing!!!!!

I usually buy ingredients for a certain recipe. Although, I do pick up specialty ingredient kits on occasion.

There are many recipes out there for different pilsners. The problem comes with fermentation. You really need to keep your swill below 55 degrees while it ferments. You also need to make sure you rack the wort off of the trub more than the rack from primary to secondary. Once or twice more, in my experience.

If you don't rack and keep everything VERY sanitized, you develop off flavors.

If you have a certain pilsner in mind, let me know. I probably have a recipe you can follow.
 

spddrcr

NEED DECALS? PM ME!!!!
actually i do have a system for making beer drinkable a day or two after it's done fermenting, I just turn up the c02 bottle thats in the kegerator wayyyyy high and it gets the job done:teeth
 

PhoS

[ˈfäs]
We just keg it , and pump in C02 while rolling the keg around for 20 minutes and that usually does it for a quickie.
 

dwarf

Super StreetFighter
ok guys and gals, Ive decided to brew more beer after my 2 year hiatus from brewing and at the request of my wife and friends so im thinking what better way to to get back into it then by having a big brewday/techday at my house on the first day of the new year:teeth

anyone interested in coming out to concord to brew? I have multiple equipment setups for doing extract and 1 setup for partial brewing. I also have just about every known tool for fixing bikes.

does this sound like a good idea or am i crazy?:wtf

I don't know how to, but would love to watch.. and use your tools to work on my bike :teeth
 
Top