How to paint a motorcycle without a compressor & spray gun

freeside

Active member
reckon:
Thanks for all the help so far. I know you've given a lot, but I wanted to ask for a little more. I'm planning on repainting my 2008 vstrom and the paint is in perfect condition. I'm going from yellow to black.

Should I sand the existing clearcoat, lay down an acid etch then go with my color coat from there? Or do you think I should use an adhesion promoter first?
I'm going with the SEM bumper black.

I've successfully painted two pieces on my project bike so far, and they turned out incredible. So much damn work, but they look great.

Here's some shots of the process:
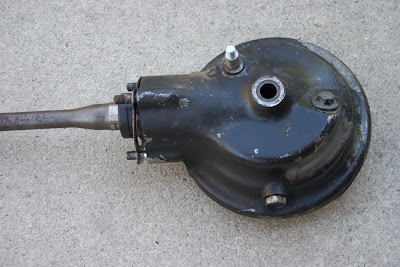
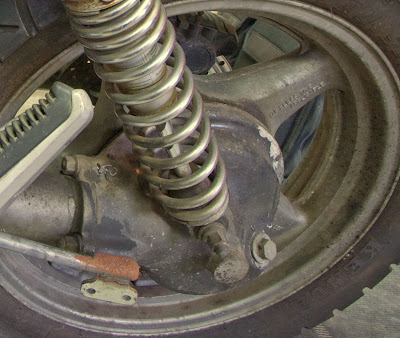
starting condition:
final-drive-as-bought.jpg

starting condition off the bike:
final-drive-as-bought2.jpg

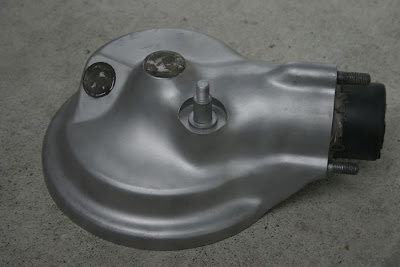
blasted clean:
blasted2-small.jpg

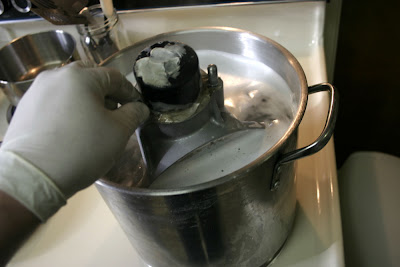
treated:
alumiprep2-small.jpg

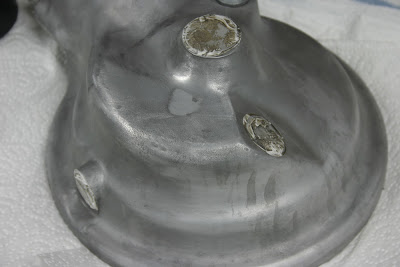
filled:
metal2metal2-small.jpg

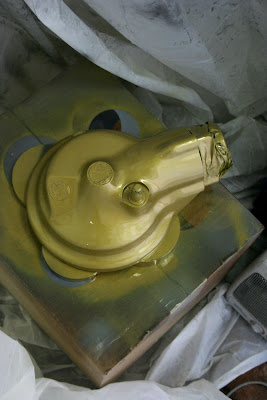
and final result - completely dry:
painted1.jpg

Cheers,
-Stephen in pleasant hill
 
Last edited:

Jet City

Well-known member
Yeah, when gas got spilled on it, it instantly stained the clear. I'm curious if the U-Pol clear would hold up any better. It's a race bike, so I'm not overly concerned.
 

Gearhead

New member
I did a test on one of my test panels about 25 days after I put that U-pol clear on and it held up fine, there was some strange swirl marks after i wiped it off but that probably was because I tested with the gas that had that blue 2 cycle oil in it (for my weedwacker) If I wanted to I probably could have cleaned it off with denatured alcohol or bug and tar remover.

Man I'm excited, I'm really sold on that stuff, the only drawback is that it takes a awhile to dry and harden.

Yeah, when gas got spilled on it, it instantly stained the clear. I'm curious if the U-Pol clear would hold up any better. It's a race bike, so I'm not overly concerned.
 

TeeSnob

神の憤りを恐&#
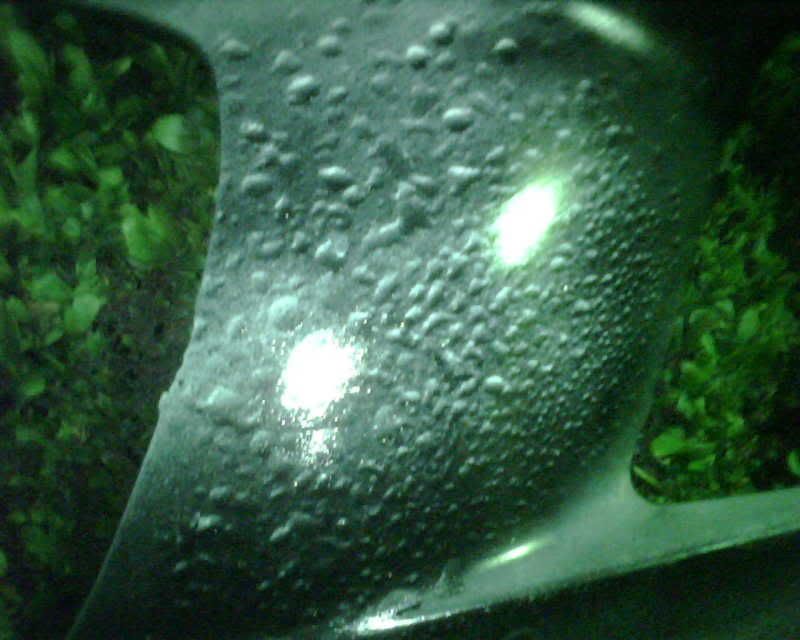
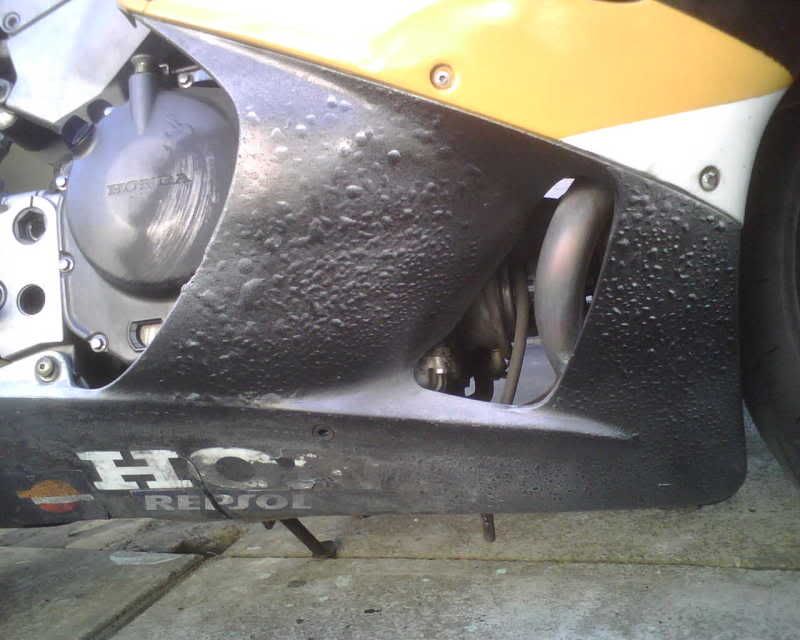
water drop effect... this is my first attempt, no clear coat.

IMG00589.jpg

IMG00593.jpg
 

Jcrocker

Quote: Originally Posted
Yeah, when gas got spilled on it, it instantly stained the clear. I'm curious if the U-Pol clear would hold up any better. It's a race bike, so I'm not overly concerned.
Ya i'm not that concerned unless I try to resell the bike. Anyone know of a solvent resistant satin or flat finish ?
 

MSFIT

Well-known member
Masking Tape

Was talking with Reckon through PM's about masking off for different colors/patterns and not sure what masking tape to be using.

I started painting my tank with a flat green(rattle can). I'm going to be following the original F4i paint/sticker scheme with different colors. So I will be painting gloss black wings on the green, then clear coating over just the wings.

Reckon said:
when you say "blue masking tape", your probably referring to the stuff at OSH, or home depot, and THAT is designed for LATEX HOUSE PAINTS,...not paints with high levels of VOC's (solvents)

so pop down to ANY autobody supply house (finishmaster has shops all over the bay area)
and get a roll of 3M BLUE FINE-LINE tape ($7-$8), in 1/4" width, while your there get a roll each of 1" and 2" width 3M "lime green" masking tape (these are pricey tapes, but THEY WORK), and use the very flexible blue fineline tape (turns corners amazingly easy) to mask off your honda wings, then use the lime green tape to fill in the spaces, and then use a PLASTIC GARBAGE BAG, for the bulk of the major masking (so your not using an entire $8 roll of tape to cover large areas)

then shoot your wings, and the clear, (go as light here as possible, JUST shoot till you get hiding and gloss, and then STOP SHOOTING, DO NOT HOSE THE THING DOWN HERE, or you get a big fat edge, that will chip later) and then LEAVE IT ALONE FOR SEVERAL DAYS BEFORE PEELING,.....or you can lift your design right off the surface.

note all the above tapes have about 400% more "sticky" than the stuff you are used to (that's why they don't bleed) so USE CARE AND GO SLOWLY when peeling, I am DEAD serious about pulling ALL the coats off, if you just start ripping the tape straight up off the surface, so when peeling, try and pull straight BACK, sort of folding the tape over itself as you pull, and you'll see the "curl" actually cuts through the paint, leaving you with a beautiful crisp, clean line with no "raggedies", or fraying at the edge,.......if done correctly the lines you get with the above method will be as clean as the lines on pool table balls.

now, when you peel everything, your going to have a raised edge between the two colors, how thick that edge is depends on how much paint you shot for the wings (which is WHY you shoot graphics LIGHTLY, never a bunch of extra coats),...that edge can be a problem later on (it'll chip easily right AT the edge) so you may wish to use some pinstripe tape of the same color and go around the edge,.....I bridge the two colors with it, but you could apply it to either side of the design (on the wing, or on the tank) and it'll protect the edge almost as well, and then you dont have the "crease" in the pinstripe tape which is the bump from the edge showing through.

or just leave it and use care when washing, or wiping.

OR: you can "blind shoot" the wings,....read along,......you'd have to start over for this method, which is why I'm listing it as a alternate method, but in reality, THIS is how you want to shoot a two color graphic be it a stripe, wing, funny face, BARF twofinger salute, whatever,........................FIRST you'd shoot the black and clear on the sides of the tank, and let that cure COMPLETELY (a week at LEAST), THEN mask off your wing design, just covering up where you want the black to stay (it's about 200% LESS tape this way too), THEN shoot your flat green (again JUST for hiding, you don't want a fat edge here either),...and again let cure for several days to a week before peeling,...NOW when you peel, you'll notice that the wing has a RECESSED edge, and those are MUCH harder to damage for some reason, so you get the same clean line, but it'll last longer, and I almost never use edge pinstriping (tape OR brush) to cover the edge when the design is blind shot (so called because you don't use any masking for the initial color),......next time check that method out.
 

reckon

the cake is a lie
Ya i'm not that concerned unless I try to resell the bike. Anyone know of a solvent resistant satin or flat finish ?

not with this type of spray can paint,...but,....if you have a compressor and spray gun:

HOT ROD FLATZ, just rool the universe as far as flat cool colors,.....check out how many they have
http://www.tcpglobal.com/kustomshop/ksflatz.aspx

tough as iron too, spill gas on it all day long, no worries......I REALLY like their pre flattened clear, as it lets you make a flat or matte finish out of ANY color, or pattern,.......as adding a flattening agent to a traditional urethane clear coat just RUINS the viscosity, and thixatropic properties (how well it clings to vertical surfaces without running), so THIS pre flattened stuff is AWESOME, shoots like a dream, and you hardly need more than 2 coats ever.

but as far as spraycan moisture activated, or "bottom button" urethanes: not to my knowledge
 

kappy5003

New member
Hi All,
I'm new here, but have been soaking up this post but still would appreciate some advice.

My ride is an X Police ST1100 and white, I've had it my mind for some time to change the colour of some of the panels and have been experimenting with some rattle can colours.

I started out with a few small cans(150gram) brand (Power Plus) from the local motor accessory shop, and found it quiet acceptable, ease of use application OK. I have practiced with a few small panels in that if it didn't work out I could rub it back. The colour in this brand actually dries quite shiny once covered and when applying the same brand clear finished quite shiny as well and you could almost could get away with out buffing.

However the small can option is more for touch ups and is not economical but in theie large can option the colours are restrictive.

So came across a product called U-Pol custom can,Professional spray paint
The retailer mixes the colour of choice and adds it the the aerosol can. Not real cheap (AUD$30 a can compared to $18.00 for off shelf brand)

Now to the point, sorry about the short story!!!:rolleyes

I had a practice and immediately noticed 2 differences,
1.The spray nozzle is different claiming spray gun equivalent so coverage is wider than cheaper can and no spattering:twofinger
2.The finish after complete even cover is dull and almost grainy. I read somewhere the colour is just that and the shine comes from the clear coat is that true?.

Next question some, my practice pieces have been covered in a dark wine berry colour and the colour I have settled on is a slightly lighter colour red, although still dark. Will the lighter colour eventually hid the darker colour or should I consider a lighter or undercoat primer over the darker colour.

I hope I've made sense and look forward to some great advise.
 
Last edited:

jonko

Well-known member
awesome thread

Thanks Reckon!

This is an awesome thread and exactly what I would have wanted when I painted my fairings.
 

pororican

BORICUA100%
Dam" all I learn with this guy about painting just by reading. I just spray paint my bottom cowl and it looks like some shop did it for me. thanks reckon
 

skolapper

Member
How to paint a motorcycle without a compressor spray gun

Update: I spoke to my friend who also says its a battery issue, but he tells me when i jump start, not to turn on the car.. im not sure if he means dont start the engine or to just leave the key in the on position so that the radio can still play as well, or to just hook it up and sit there and wait. Opinions?
 

guasibn

Member
I was okay with the old paint job on my VT600, but this post has inspired me to try repainting it. Thanks for all the info! Quick question though, about how much paint would I need for my cruiser if all i wanted to paint was the gas tank and the front and rear fenders?
 

Lazerus

Pissant squid
Thanks for such a thorough write up. I've been following along step by step, and so far so good:thumbup stripped down and filled the tank, and that metal-2-metal works great!

Going to shoot primer today:teeth
 

Krazy9er

Member
hey so i finally got off my lazy butt i followed this thread to a "t" except for the gloss clear i went flat gloss i ablsolutly love the finish thanks a million!!!!


hopefully these pics work

Before
Picture003.jpg

Picture007.jpg


AFTER !!!

IMG_7264.jpg


hopefully its ok to post here just showing how good these instructions are. even i can follow them!!
 
Last edited:

MSFIT

Well-known member
Looks like the F4i turned out alright, almost a shame though to paint over the red/white scheme.
 
Top